Showing posts with label summer. Show all posts

Wednesday, June 10, 2015

Lunch with Leftovers: Rice Salad with Strawberries

This is the last salad for now. I have to think up what I will publish from my backlog next. But today there is one more salad that I made. I used all kinds of leftovers I had in my fridge. The only think that I bought new were the strawberries. This recipe is great to use up some leftover rice from the day before.


Rice Salad with Strawberries: (serves 2)
- about 1 cup basmati rice
- some feta
- about 1/3 of a cucumber
- handful of cherry tomatoes
- about 10 small strawberries
- mayonnaise
- fresh basil

Cook the rice if you haven't got any leftovers. Let it cool down for about 10 minutes.
Cut the cucumber into cubes, the strawberries into slices and the cherry tomatoes in half. Add in a bowl with the rice.
In a small bowl, place a heaping tbsp of mayonnaise. Thin it with a tiny bit of water. The mayonnaise will shift in the beginning but keep stirring. Then chop some basil and add this to the dressing. Stir the dressing through the rice. and crumble some feta into the salad.


Tuesday, June 9, 2015

Summer Special: Mexican Bean Salad

This has got to be my favorite from the salad recipes that I tried in the past weeks. I think this could be easily a new summer favorite for the super hot days, because you don't have to spend time behind the stove at all. The original recipe is from Oh My Foodness. I left out the raw red onions, but otherwise I didn't change that much. The lime juice makes it extra refreshing.


Mexican Bean Salad: (serves 2)
- 3 kinds of beans, 400 gr in total (I used mixed beans from HAK which had white beans, kidney beans and brown beans)
- 100 gr corn
- 1 avocado
- 2 tomatoes
- tortilla chips
- sour cream
- black pepper
- lime juice

Place corn and beans together in a colander. Rinse and drain the veggies until the water is clear. Make sure that as much from the fluids are drained as possible. Cube the tomatoes and avocado. Place everything together in a bowl and mix. Add some sour cream with lime juice and a dash of black pepper and stir through the salad.
In a deep plate, place the tortilla chips on the edges and lay the salad on top.


Monday, June 8, 2015

On a Budget: Potato Salad with Chilli Yoghurt Dressing

Sometimes you get the best ideas when looking in your fridge. I posted a tuna salad yesterday, and I made this salad the day after I made the tuna salad. I used a lot of the same ingredients because I has leftovers, but this salad tasted completely different. It is fun to find out how you can make a completely different dish while changing very little.


Potato Salad with Chilli Yoghurt Dressing: (serves 2)
- 200 gr small potatoes
- some cherry tomatoes
- 1/3 of a cucumber
- Few hands of lettuce
- 1 cup of Greek yoghurt
- 0.5 cup of sweet chilli sauce

Bake the potatoes. Meanwhile cut the cucumber and cut the tomatoes in half. When the potatoes are done, toss everything in a bowl. Add some hands of lettuce. Mix the chilli sauce with the yoghurt for the dressing and coat the salad with it. Enjoy :)


Sunday, June 7, 2015

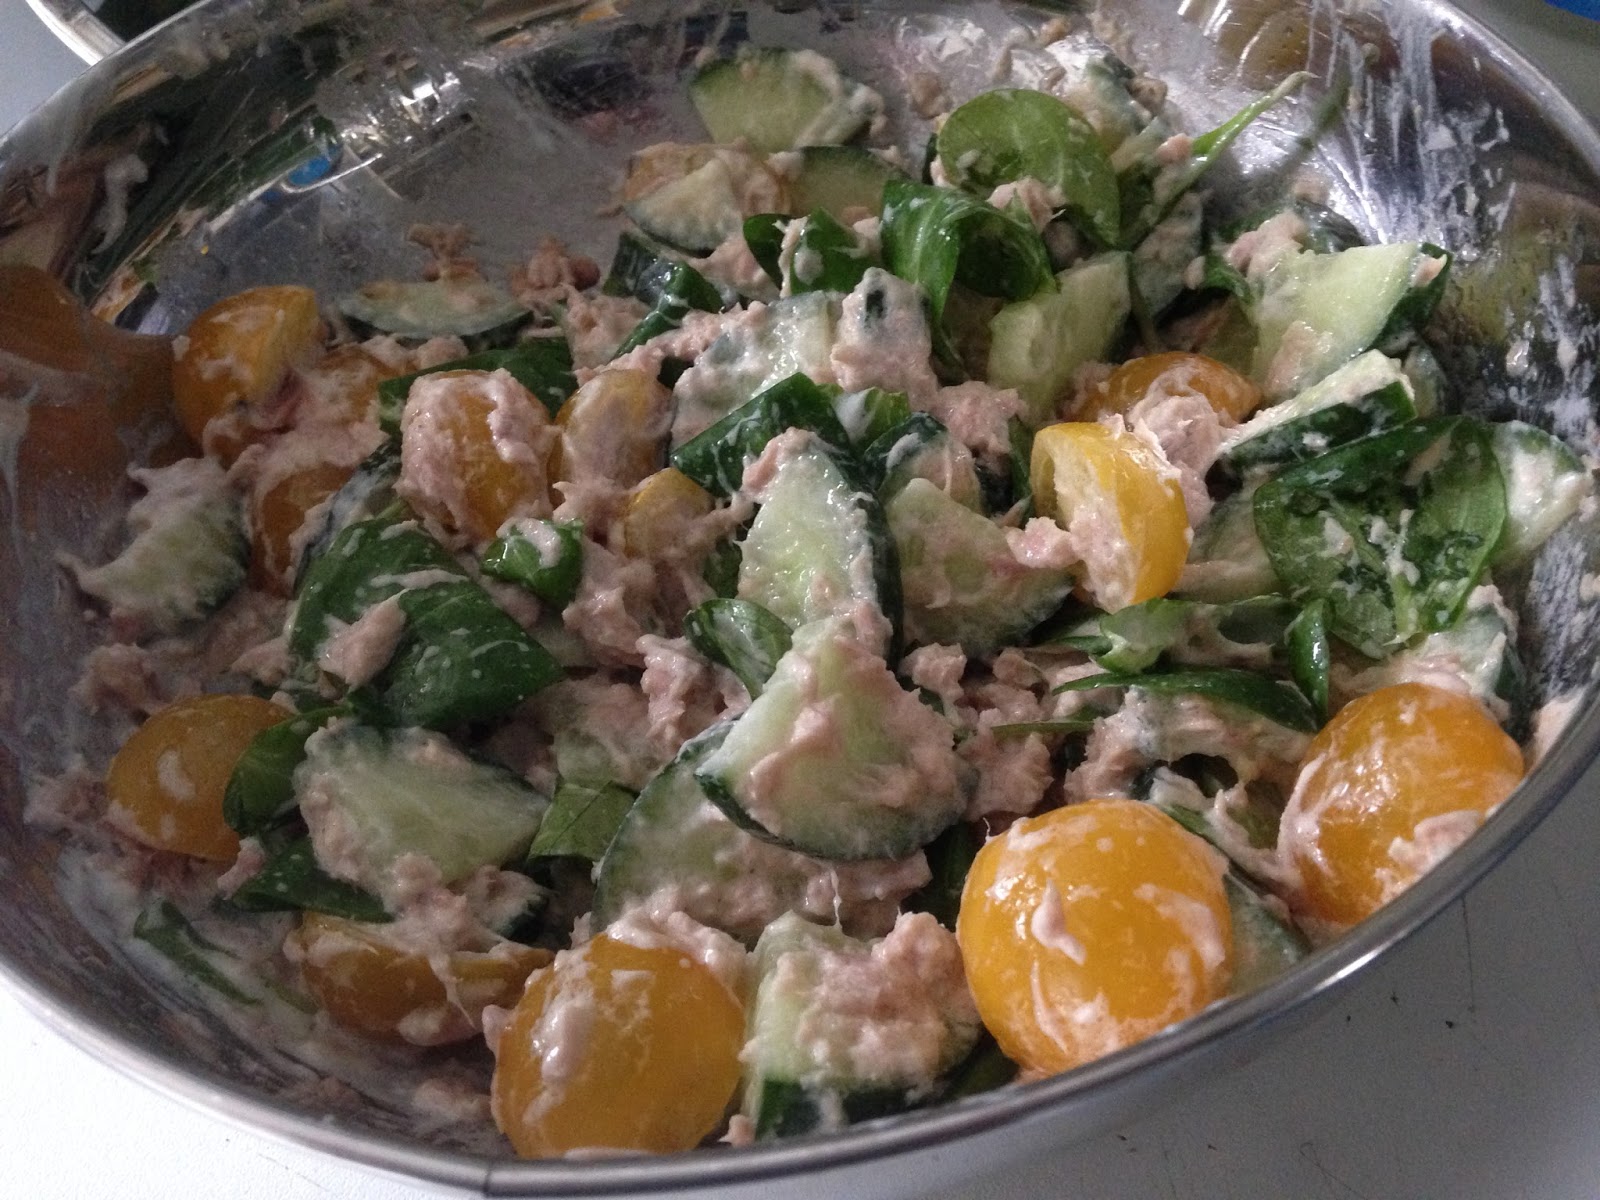
Fabulous Fish: Basic Tuna Salad

I don't get the chance to eat tuna a lot, because Nick doesn't like it. But he wasn't home and I wanted to make something easy but tasty. I actually made this Tuna Salad for lunch but I also had it for dinner that same night. There are several versions of basic tuna salads, but most of them have capers and raw onions in them. Both tastes are too strong for me and I really don't like them in my salads. I loved the simple tuna salad on Voedzaam en Snel, but I left out the onions and I served the salad in a wrap.


Basic Tuna Salad: (serves 2)
- 1 can tuna
- cucumber, 15 cm
- some cherry tomatoes
- rocket lettuce (or other lettuce to your taste)
- 2 tbsp yoghurt
- 1 tbsp mayonnaise

Drain the tuna well and place it in a bowl. Cut the cucumber. I sliced it and then cut the slices in 4. Half the cherry tomatoes. I used yellow ones this time, but you can use any tomato you want. Toss in some rocket lettuce or other lettuce to your liking.
Mix the yoghurt with the mayonnaise for the dressing.
I served the salad in a wrap but you can serve it on its own as well.


Thursday, July 24, 2014

Lammas: Courgette Corn Pancakes

In about a week or so the first harvest feast is upon us. Lammas is one of three harvest celebrations and is held on 1 or 2 August. All grains are usually the focus of this celebration, but also summer berries, mainly blackberries, are used a lot in Lammas recipes. Next to wheat, corn is a grain that we see a lot of focus on. In the actual Lammas weekend Nick and I will be celebrating our b-days, so there won't be so much focus on Lammas cooking this time. But I have at least one other recipe I want to make. I was also hoping to bake a type of bread from scratch, but I am not sure if that is going to happen this time.

Today I will share another very delicious pancake recipe. I found this on Girl versus Dough. And they are sooooo goooood!! I have already discovered several great pancake recipes this year. I am really happy about that :)


Courgette Corn Pancakes (about 10)
- 4 large eggs, beaten
- 0.25 cup olive oil
- pinch of  salt
- 0.5 tsp ground pepper
- 1 tsp dried basil
- 1 tsp dried oregano
- 3 cups grated courgette (1 large courgette)
- 1 cup fresh sweet corn
- 1 cup shredded cheddar cheese
- 1.75 cups all-purpose flour
- sour cream (for serving, optional)

Combine eggs, oil, salt, pepper and dried herbs in a bowl. Add the courgette, corn and cheddar and stir thoroughly with a spatula. Add the flour and stir until thoroughly combined and there are no pockets of dry flour hiding in the batter. Heat a small amount of oil on medium high heat in a large frying pan. Scoop 0.25 -cupfuls of batter onto the pan and flatten into a circle. Cook on each side about 3-4 minutes, or until a deep golden brown. Remove from pan and transfer to a plate. Repeat with remaining batter. Serve warm with some sour cream.


Thursday, July 10, 2014

Summer Special: Cauliflower and Pea Salad

While yesterday I was wearing a sweater because it was cold and rainy, today it is tropical again. A perfect day not to spend too much time in the kitchen and prepare a light salad for dinner. As I told before I am not very much into leafy salads but I grow to enjoy salads with other veggies as a main ingredient. I was looking for a cauliflower recipe, because it was on sale when I saw this cauliflower and pea salad from Lekker en Simpel. I really like the texture and taste of this salad and we will surely make this again! Because my boyfriend doesn't like mustard, we left that out.


Cauliflower and Pea Salad (serves 2)
- 2 eggs
- 200 gr cauliflower
- 100 gr peas
- 1 spring onion
- 2 tbsp mayonnaise
- 1 tsp paprika powder
- salt & pepper

Boil the eggs and steam the cauliflower. Cut both into bite size pieces. Cut the spring onion, and bake shortly if desired. I don't like raw onion, so I always do this. Mix all ingredients in a bowl and taste. Adjust the seasoning if needed.


Sunday, June 29, 2014

Litha: Sun Cookies with Lemon Curd

I am aware that Litha was last weekend but I want to spread out the recipes. So here is my final Litha recipe for the year. We made sun cookies, to honour the longest day of the year. On top of that we made our own lemon curd. This was something I wanted to do for a long time. So today I will give you 2 recipes, the one for lemon curd, originally from ohmyfoodness, and the one for the cookies from Yummy in my tummy, which used bought lemon curd. But it is a great base recipe for cookies! You can use all kinds of filling for the cookies, they can be rolled, but the dough can also be rolled out to use your cookie cutters. I bought a sun cookie cutter from koek-it to make these. We had a nice jar of lemon curd. The leftover we ate with poffertjes, Dutch mini pancakes. And because I had so much leftover, I baked another batch of cookies a few days later ;)


Sun Cookies with Lemon Curd:

Lemon Curd: (400 ml)
- 2 lemons
- 150 gr unsalted butter, room temperature
- 2 eggs, room temperature
- 125 gr castor sugar

Place butter in a small pan and let it melt slowly. Squeeze the lemon juice in the pan and stir through. Meanwhile mix the sugar and eggs until airy. Pour the butter mixture with the eggs and stir through. Add everything back into the pan and bring to a boil. Let it simmer on low until the mixture thickens, for about 2 minutes. Pour it in a sterilized jar and place it in the fridge to cool down. It will thicken more.
The lemon curd will keep for about a week and a half.

Sun Cookies: (about 12-15 cookies)
- 110 gr butter, room temperature
- 50 gr powdered sugar
- 1 egg yolk, room temperature
- 150 gr flour
- 25 gr corn flour
- lemon curd

Pre heat the oven to 180 degrees. Place a baking sheet on your baking tray. Mix the butter with a mixer. Sift the powdered sugar in the bowl and mix together. Then add the egg yolk and mix again. Sift flour and corn flour and stir through with a spoon, and eventually using your hands to form a nice ball of dough. Only until there are no trances of flour left, do not over knead!

Put some flour on your work desk. Roll the dough until you have the height of your cookie cutter. Use the cutter to make cookies. Roll the dough again until you have not enough left to cut out another cookie.
Place on the baking sheet, and gently make a hole with your thumb in the middle of the cookie, but do not stick it all the way through. Fill the holes with lemon curd. The cookies won't grow much bigger so you can place them fairly close to each other.
Bake for 10 minutes, but not more than that. If you do, the lemon curd starts to caramelize (well at least with the home made version) The cookies will stay fairly light.


Thursday, June 26, 2014

Summer Special: Garden Tomato Soup

I hardly eat soup in summer even though I know it is a very good thing to eat soup in the summer. But I did make this soup a couple of weeks ago. This is really the sweetest tomato soup I ever ate. It is light and creamy and taste like summer in a bowl. The recipe used is from Will Cook For Friends.
I served it with a grilled mozzarella and pesto sandwich, but a more simple version than that is used on the blog. The soup was very tasty, but I think it did some calculations wrong, because I used 8 tomatoes, like suggested, but we only had half a bowl each. I guess I should have checked it better. Anyway, I hopefully corrected it in the recipe, so next time we have full bowls of soup ;)


Garden Tomato Soup:
- 1350 gr fresh tomatoes
- 3 to 4 tbsp olive oil
- 1 red bell pepper
- 3 cloves of garlic, chopped
- 1 spring onion, sliced
- 4 tbsp fresh basil, chopped
- 2 tbsp fresh oregano, chopped
- 1 tbsp balsamic vinegar
- 1 cup of water
- salt & pepper to taste

Pre heat the oven to 200 degrees. Half the tomatoes and lay them on a baking sheet, cut side up. Quarter the bell pepper and lay on the baking sheet too. Drizzle the olive oil on the veggies and make sure they are covered nicely, add a pinch of salt. Roast for about 45-60 minutes and turn them halfway.
Saute the onion and garlic in a large pot for about 2-3 minutes. Add all the tomatoes, bell pepper (including the juices on the baking sheet) and 1 tbsp of basil.
Stir to combine and blend the soup. Add another tbsp of basil, 1 tbsp of oregano and the vinegar, stir to combine. Add water as needed to thin the soup as desired. Heat the soup through. Then seaon with the rest of basil, oregano and salt/pepper if desired.


Sunday, June 22, 2014

Litha: Peach & Basil Risotto

Yesterday it was Litha, the longest day of the year. And as usual we cooked something special on that day. Actually we are spreading it out over the weekend. Today we will bake sun cookies, that recipe will follow later. I discovered I have a love for risotto with a sweet touch when I made strawberry risotto for the first time. That is why I really wanted to try this risotto as well. It is a really nice dish, not too sweet, but the peaches create little bites of sweetness. It is a great combination with the basil. The original recipe comes from Tasty Kitchen.


Peach and Basil Risotto: (serves 3)
- 3 cups vegetable broth
- 2 tbsp butter
- 1 cup risotto rice
- 0.5 cups grated parmesan cheese
- 0.5 cups peaches, chopped (about 3)
- 1 tbsp fresh basil, chopped
- pinch of salt
- pinch of nutmeg

Boil some vegetable broth. Make sure it stays warm, or else the rice will cool down too quickly. In a large pan melt the butter. Add rice and coat with butter. Fry for about 1 minute. Pour in about 1 cup of broth and let it simmer until the rice has absorbed the broth. Stirring regularly. You do not have to stir all the time, but never leave your risotto alone. Add more broth when the first batch is absorbed, about 1 cup at a time and let the rice absorb the broth before you add more. Do this until your rice is done, for about 15-20 minutes.
Remove from heat and stir in cheese, basil, peaches, salt and nutmeg.


Tuesday, June 10, 2014

Summer Special: Yoghurt-Peach Ice Cream

Now with the hot weather, I thought it would be a good idea to get this fresh ice cream recipe on the blog soon. It is very easy and I enjoyed the combination of flavors. I think you can do this with almost any type of fruit, but I have yet to try that. The original recipe come from Week of Menus.
I have to admit that I don't use the ice cream maker as often as I would like, but I hope to change that this summer! :)


Yoghurt-Peach Ice Cream:
- 3 cups fresh peaches (about 6)
- 2.5 cups Greek yoghurt
- 0.25 cups honey

Peel the peaches and cut into chunks. Mash them in a food processor. Then add the Greek yoghurt and honey, and blend some more. It is wise to change your blade to that plastic circle thingy that comes with the food processor at this point.
Then transfer to the ice machine and let it run for 25 minutes.
Freeze for 2 hours minimum.


Thursday, June 5, 2014

Litha: Spaghetti with Tomato-Peach Sauce

Litha is drawing near and with that the beginning of the summer. Of course I will cook with the seasons again and will post a few Litha recipes in the next couple of weeks. Foods that I associate with Litha are of course all kind of fruits that are in season now, like cherries. But especially fruits that represent the sun. Think oranges, lemons, mango, peaches but also tomatoes. Thyme, basil & lavender are herbs that are used often. I choose to make spaghetti with tomato peach sauce because the combination sounded different but nice and sweet. And also because I use any excuse to get my fruits in. The original recipe is from Running to the Kitchen.


Spaghetti with Tomato-Peach Sauce (serves 4)
- 2 large peaches, chopped
- 4 cups cherry tomatoes
- 1 spring onion, chopped
- 3 cloves of garlic, tops sliced off, drizzled with olive oil and wrapped in aluminium foil
- 2 tbsp extra virgin olive oil
- 1 tbsp honey (replace with agave syrup for vegan version)
- 0.25 cup basil leaves
- 1 tbsp balsamic vinegar
- 0.25 tsp cinnamon
- 450 gr spaghetti
- salt & pepper

Preheat oven to 200 degrees and grease a baking sheet. Mix peaches, tomatoes and spring onion with olive oil and honey in a large bowl and then spread out onto baking sheet. Add garlic cloves wrapped in aluminium foil to the baking sheet as well. Roast for 25-30 minutes, tossing occasionally. Once roasted, remove from the oven and let cool for 5 minutes. Meanwhile cook the spaghetti, drain and return to the pot. Unwrap garlic cloves and remove roasted garlic from it’s shell. Add garlic and tomato/peach mixture to a food processor. Add remaining ingredients and process until blended but still slightly chunky. Season with salt & pepper to taste and add the basil. Mix spaghetti with the sauce and toss to coat.

The first day the sauce was rather thin and a bit soupy. On the second day the sauce thickened and tasted even better than the first day :)


Thursday, May 22, 2014

Summer Special: Strawberry Salmon Salad

This is hardly a recipe, but I wanted to share this easy dish anyway. It is great for summer and the salad feels special because of the strawberries and the salmon. I love all the ingredients in this salad and they taste so great together!


Strawberry Salmon Salad (serves 1)
- 1 avocado, cubed
- 100 gr fresh salmon (or baked, whatever you prefer)
- couple of handfuls of spinach
- about 6 strawberries, sliced
- lime juice

Just toss everything in a bowl. Squeeze in lime juice to taste as a dressing. Make sure it coats everything.
Adjust the amount of ingredients to your taste. Play around with it. Maybe you like less salmon and more strawberries etc.

I told you it is hardly a recipe, but I often struggle what to have for lunch other than bread and this is a great salad. And I know that simple things like these trigger me to eat something else for lunch, so I hope it does the same for you :)


Tuesday, May 13, 2014

Easy Peasy: Quiche Caprese

Quiches are one of my favorite things to eat. They are also easy to make and the possibilities are endless. I saw a quiche caprese in the new Koken met Karin zonder pakjes en zakjes 2. And I decided to make one. I didn't follow the recipe exactly because she makes her crust from scratch too and that is a bit too much work for us, because it requires better planning and longer baking, but her recipe was a great inspiration for this quiche. This is a perfect recipe for a warm day because you don't need to spend time behind the stove.


Quiche Caprese: (serves 4)
- 6 sheets of puff pastry, thawed just before using.
- 400 gr cherry tomatoes
- 150 gr half dried tomatoes
- 2 balls mozzarella
- couple of handfuls fresh basil
- 25 gr pine nuts (optional)
- 4 eggs
- 125 ml whipped cream
- 75 gr grated cheese
- 1 Dutch rusk (biscuit rusk), crumbled
- salt and pepper

Make a crust by lining the sheets of puff pastry together in a springform. Make sure that you also cover the edges. Make holes in the pastry with a fork.
Cut the cherry tomatoes in half and squeeze out a little bit of the moist. Chop the half dried tomatoes. Cut the basil into stripes. Mix the tomatoes and basil together with half the cheese and a good amount of pepper. Beat the eggs together with the cream. Add salt and pepper to taste and add  the other half of the grated cheese. Tear the mozzarella into pieces.
Then crumble the Dutch rusk over the puff pastry. This will absorb the moist from the stuffing and prevents a soggy bottom. Add the tomato mixture, then the mozzarella and the pine nuts and lastly the egg mixture.
Bake for 20 minutes in a pre heated oven on 200 degrees.


Monday, September 2, 2013

Vegan Chocolate Chunk Coconut Ice Cream


This post is a part of Vegan MoFo. For more information about Vegan MoFo, visit their website.

Ever since I have an ice cream maker, I am always on the look out for nice ice cream recipes. Because I want to avoid eating raw eggs anyway, going vegan with my ice cream isn't such a huge step. Sadly many times the ice cream doesn't come out the way it was intended and I am stuck with a chunk of ice crystals in my freezer. Still I keep trying. Therefore I was quite delighted that I finally found a recipe on Oh Lady Cakes that stays creamy in the freezer. I am so happy with it, I am sure this is a keeper. For the original recipe, click on the link above. Below I will share my adjusted version.


Vegan Chocolate Chunk Coconut Ice Cream
- 2 cans full fat coconut milk
- 1/2 cup cane sugar
- 1 tsp pure vanilla extract
- 85 gr dark chocolate, part grated, part chopped

Whisk together milk and sugar in a small pan and bring to a boil. Continue to whisk for about 1-2 minutes. Remove from the heat and stir in the vanilla extract. Transfer to a bowl and put it in the fridge for about 1 hour to cool. Once cool, pour the mixture into your ice cream maker. And follow the instructions from your ice cream maker. Mine takes 45 minutes to make a nice thick ice cream. I added the chocolate in the last 10 minutes. Eat immediately or freeze it. Let it thaw for about 15-20 minutes before serving.

I am sure I will be enjoying this in the last month of summer.
What are your go to ice cream recipes? I am still looking for more success recipes! :)


Saturday, June 1, 2013

Pin it and Do It: Strawberry-Rhubarb Jam


One more pin for the challenge from Trish at Love, Laughter and a Touch of Insanity. I did something that I wanted to try for years, but thought was very hard to do. Making jam! Now I say, if I know it was this easy, I would have done it sooner! I made the jam according to a recipe on the blog Jolande kookt, but because it is in Dutch I will translate it below. I cut the recipe in half because no way we will eat that much jam in this house ;)


Strawberry-rhubarb jam with blueberries and vanilla (1 huge jar)
- 250 gr rhubarb
- 200 gr strawberries
- 500 gr jam sugar
- 50 gr blueberries
- 2 sachets vanilla sugar (I used 3, liked it better)

Make sure you have some clean jars. I just wash them in the dishwasher. But make them dry before use. Don't forget the lids!
Cut the rhubarb into little cubes. Cook the rhubarb in very little water. Just that they are under, no more. For about 10 minutes. Then puree the strawberries and blueberries together. I pureed the cooked rhubarb as well because I don't like chunky jams. I put all together in a large pan with the sugars. Bring it to a boil and let it boil softly for about 4 minutes. Then test the jam. Place a drop on a cold plate. Place it in the fridge for a minute and move it around to see if it is thick enough.

Pour the jam in a measuring cup for easy pouring. Place the jars on a wet tea towel, up side down, after holding the outsides under the hot water (or else the temperature with the jam will vary too much). Pour the jam in a jar. Put the lid on tightly and place them back up side down on the tea towel. Let them cool down completely.

This post is also part of Weekend Cooking, hosted by Beth Fish Reads. Please check out the other links as well for a good dose of foodie inspiration.


Monday, September 3, 2012

Meatless Monday: Lemon Cheesecake

It was my b-day on the last weekend of August, but because I was out, my mom dropped by last weekend instead. So I decided to make my own cheesecake for the first time from scratch. I love lemony flavours in cakes, pies and cookies so when I found this easy looking recipe on Goddelijke Huisvrouw, I just had to try it. I doubled and adjusted the crust recipe because I only have a large springform. But a smaller springform would be better.


Lemon Cheesecake (serves 8)
- about 20 cookies (I used bastogne)
- 150gr butter
- 40gr sugar (optional)
- 397gr (1 tin) sweet condensed milk
- 150ml whipped cream
- 175gr cream cheese
- 2 lemons

First make the crust. Place the cookies in the food processor until you have nice small crumbs. Melt the butter and add it to the cookie crumbs. Optionally you can add sugar too, but that depends on how sweet you like it. Fold everything together with your hands until it sticks together and spread the crust in the bottom of the springform. Let it cool down.
Now grate and juice the lemons. Mix the milk, cream and cheese together in a bowl with the lemon zest. Stir out most of the lumbs. Now add the lemon juice bit by bit while stirring. It will make your batter thicker. Scoop the batter onto the crust and place the cheesecake into the fridge overnight. (at least 4 hours)

Optionally you can decorate the cheesecake with red fruit and whipped cream. I only did half of mine, because not everyone did like strawberries.


Saturday, September 1, 2012

Weekend Cooking: Strawberry Risotto

In an Italian themed cookalong in July, I made Strawberry Risotto. I was looking for a nice Italian dish that wasn't that standard and I stumbled across this one. I wanted to give cooking with fruit a try, because getting in enough fruit is still one of my weak spots and that is why I decided to go ahead and make this summery risotto. The combination might sound strange, but I actually love it a lot. I hope you will give it a try as well :) I adapted the recipe from Italiaans koken met Antoinette.


Strawberry Risotto (serves 4)
- 1 or 2 spring oinions
- 2 tbsp olive oil
- 350 gr risotto rice (short grain)
- 300 gr strawberries
- 1.5L vegetable broth
- some butter
- Parmasan cheese, grated
- fresh basil
- salt and pepper

Cut half of the strawberries into little pieces and puree the other half in a food processor. Cut the spring onion and some fresh basil. Bake the onion shortly in some olive oil. Add the rice and stir fry for a minute or so until the rice gets a white color. Add about 200ml from the broth and put the heat to medium. Let the rice absorb the fluids. Keep stirring and add about 200ml fluids at one time. Add the strawberries and basil after about 10 minutes when the rice is turing soft. Also add some pepper and salt (but not too much, the cheese will add salt too). Now only use 100ml fluids at a time and let the rice simmer while stirring for about 8 more minutes until the rice is creamy and soft. Keep tasting, you will know when it is right. Turn off the heat and stir the butter and cheese through the dish. Taste some more and adjust flavors if needed. Let the risotto rest for about 1 minute and serve in deep plates.


Vegan option: You can replace the butter for margarine and use natural yeast instead of cheese. You can also leave out the latter. You will get a more sweet dish, but I tasted it before adding the cheese and I liked that version as well.

This post is part of Weekend Cooking. This is a foodie meme where all kinds of food related posts are shared, hosted by Beth Fish Reads.


Monday, June 4, 2012

Meatless Monday: Couscous salad

After cooking with quinoa, other crazy grains came into the picture. Like couscous for example. Roxanne, who I know from twitter and her blog called Smiling Beauties recommended this dish to me when I asked for easy and quick summer dishes. I am very happy that she did because this dish is so yummy!


Couscous Salad: (serves 4-6)
- 350gr couscous
- 250gr feta
- 400gr canned peas (280gr without water)
- 1 yellow and 1 red bell pepper
- 1tbsp couscous spices (I bought mine at a toko)
- some olive oil

First I cut up the bell peppers and I fry them shortly in some oil. Boil about 2 litre water for the couscous. Add water in a pan and then the couscous, stir for about one minute until the couscous is done. (it really takes only one minute). Then drain the couscous from water and place it back in the pan and drizzle with some olive oil. Cover the pan with a lid and leave the couscous for about 3 minutes. Then transfer it to a large bowl and mix it with 1tbsp of couscous spices. Taste and adjust seasoning if needed. Add the bell pepper and the peas. I always drain and rinse my canned peas to get rid of the can taste. Lastly crumble the feta over the salad and mix it all. It can be served luke-warm or cold. Both taste great! It is also a very good lunch and easy to bring with you in a bento.


Saturday, July 16, 2011

Weekend cooking: Easy Banana Milkshake

banana milkshake
Picture by Roboppy

Last week I had an ice cream recipe and today I will share a recipe for a very easy and delicious milkshake I made twice in the past week.

And twice I forgot to take a picture from it because I drank it before I realized it! Actually this recipe is a bit in between a milkshake and a smoothie. Since it doesn't contain any ice cream, but it does have a milkshake like texture.

I adapted the recipe from Smoothies Maken.

Banana Milkshake (serves 1, but I multiplied it once for 3 and once for 4 persons and that works fine)
- 1 banana from the fridge (or freezer if you want it colder)
- Vanilla Yoghurt, as much ml as the banana weighs in grams without the peel.
- 160ml rich milk
- 30 gr sugar
- Cinnamon to taste

Basically you just bland everything together until you have a smooth mixture :) However if you have a blender like mine with the knives on the bottom of the blender, better mix it this way:
- Mix the milk with the sugar and cinnamon first. Then add the youghurt and blend again. Lastly add the chunks of banana and mix on high speed for a few minutes until the mixture is smooth. Serve immediately! I am serious! Leave the clean up till after you drank the milkshake :)

Don't forget to check out the other weekend cooking posts! People share a lot of inspirational food stuff each weekend :)

Sunday, July 10, 2011

Weekend Cooking: Mango Ice Cream Recipe

I recently bought an ice cream maker. It was something that has been on my wishlist for a while and I was lucky to come across one on discount. Now that Zeronic works in a fruits and veggies store and gets a discount on them, it is really worthwhile to make ice cream and smoothies ourselves. Besides the store bought ice cream has often so much sugar and artificial ingredients that it is much more healthy to make your own. Another thing is that it messes up our taste buds completely and let us believe that mango for instance should taste like the artificial stuff that is produced. I do love ice cram especially in summer time so I decided that it was time for change now. If it was up to me I would eat tons of it, so better make a more healthy kind when I can ;)

I found a good recipe for eggless mango ice cream on Yummy in my Tummy. I opted for eggless because it has much fewer health risks and my health already isn't that great. Do keep in mind though that eggless ice cream will melt a little sooner than ice cream that is made with egg. For the Dutch people, you can find the recipe on Yummy in my Tummy. For the non Dutchies, I will post a translation here:


Mango Ice Cream: (with real mango, OMG!)
- 1 Mango
- 200ml whipping cream
- 100ml milk
- 70gr sugar

Peel the mango and cut it up. Mash the mango a bit to free up some juices. Warm the mango with the sugar on low heath so the sugar gets absorbed. Keep stirring and let it simmer for about 2 minutes. Remove from the heath and let it cool down. Transfer the mixture into a bowl and add the whipping cream. Mash everything up with a hand held blender. Add the milk and mix. Then add the mixture to the ice machine. It should take about 40 minutes. Then place the ice cream in the freezer for a minimum of 2 hours. Remove 30 minutes before eating.

To me it took me a bit to getting used to the flavor since the ice cream taste very pure, but I will be honest that my taste buds have been spoiled by factory ice cream as well. But I really want to get used to this, because it is so much better for me :) Do you make your own ice cream?

This post is part of Weekend Cooking and Whip Up Something New. Please check out the other links :)